I’ve been using LED lighting for professional photography in a studio environment and out on location for several years now. I’ve seen how the technology has improved both in quality and costs.
With this in mind, I am planning to convert all the florescent tubes and energy saving bulbs in my house to the new LED types. This should see a saving of electricity of at least 40 to 50 per percent.
The LED lamps emit almost no heat and will keep the air conditioners running cooler at the same power consumption. LED bulbs also do not emit any light in the non-visible spectrum such as UV and IR. These rays can cause fabrics and other things to fade and notably; cause eye fatigue. Plus; all LEDs are instant-on and will have no buzzing sounds or flicker.
I paid a visit to my favourite electrical store in Pasar Road to see the latest development and to study what’s available locally.
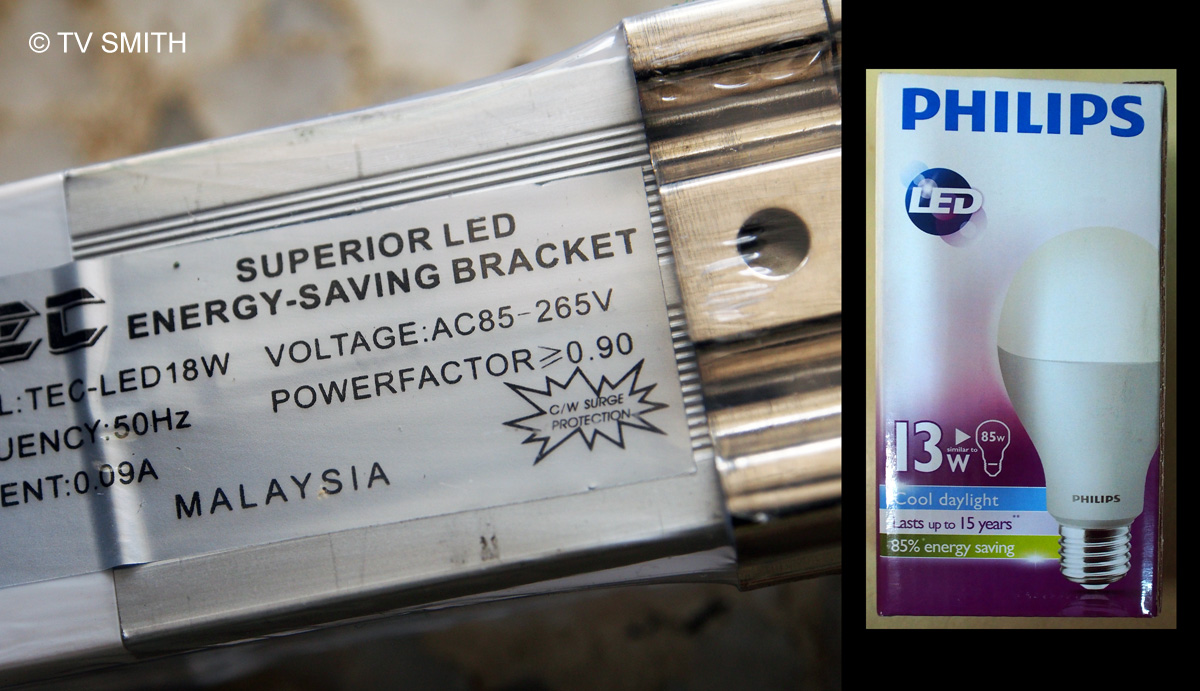
First item I bought was a 18 watt Philips LED bulb (RM40) that is equivalent to a 85 watt or 1055 lumen incandescent lamp in brightness. It is projected to last 15 years. Only disadvantage is; it is not dimmable (for this model). One year ago, such a bulb would have cost over RM100 each.
I would take lifespan rating with a grain of salt as there is no real way to truly test except to run it for 15 years. The newer bulb types came out a few months ago, so testing is by simulation not real-world use.
Second item is a Malaysian assembled TEC LED 4ft lamp (RM48) that comes with its own aluminium fitting. It is rated 18W and replaces the 32 watt 4 feet tubes. It has a claimed lifespan of 10,000 hours. I opted for the daylight colour version. The casing and lamp is so light that you can even use 3M (not just any brand) double-sided tape to hold it. I drilled two holes and used the clips that come with it.
Although it is mounted on the wall at almost ceiling height, one of my cats took it down while leaping to get a lizard. It fell 12 feet onto hard concrete and the tube didn’t shatter. Traditional florescent tubes would have left dangerous mercury-lined glass shards flying everywhere. I plug the whole unit back and it worked without a blink. Surprisingly tough; these plastic LED tubes..
I saw in the shop a 3-channel wireless after-market remote control branded as Tomato (RM40). Wiring it up is a bit complex and you should not do it yourself unless you know what you are doing. After fitting it, I was surprised that I can trigger the kitchen light from a room upstairs. It uses radio waves instead of infra red. I think I may install the remote control for bedroom and living room later for the perfect sedentary lifestyle. Lol.
Next, to try (the shop didn’t have it in stock); is the new generation LED replacement tubes (RM40). Just replace your old fashioned tubesi with the LED tubes. No need to open up the casing to re-wire, or remove the ballast (choke) as before. I think you only need to remove the starter. One year ago, the replacement tube fitting was quite messy and will involve a electrician.
Each year millions of discarded florescent tubes containing toxic mercury gets dumped in landfill. Besides saving on electricity, you are helping the environment a bit. On the other hand, LED light/lamps may contain rare earth phosphor. At least, you don’t need to discard them as often as before.
The thing is: to save money, you have to invest money first. That is what stops most people, understandably. Best strategy is to replace gradually as each of the other type of fluorescent, incandescent or energy-saving bulbs in your house burns out.
Picture of TEC LED tube back casing on left, and Philips LED bulb on right, both lit by the phone’s LED light.